

- Telescopes
- Overview:
Telescopes - Achromatic Refractor
- Apochromatic Refractor
- Overview:
Apochromatic Refractor - ED Refractor - less color aberration than an achromatic
- SD APO - color free 2-element APO objective
- EDT APO - 3 element ED objective
- High End APO with 3-element APO objective - no color aberation
- Flatfield APO with flat field for Astrophotography
- All Apos and EDs from all manufacturers - large overview
- TS APO and ED from Japan with high quality optics
- Overview:
- Newtonian Telescopes
- Dobsonian Telescopes
- RC Ritchey Chretien Telescopes
- Casssegrain Telescopes
- Reflektor Telescopce with Lens Correcture
- Maksutov Cassegrain Telescopes
- GoTo Telescopes
- Smart Telescopes
- Solar Telescopes H-Alpha
- Overview:
- Mounts Tripods Rings Rails Power Supply ...
- Overview:
Mounts Tripods Rings Rails Power Supply ... - Mounts Equatorial with GoTo
- Mounts Equatorial without GoTo
- Mounts Azimutal with GoTo
- Mounts Azimutal without GoTo
- Mounts GoTo - Harmonic Drive
- Travel mounts for astro imaging
- Tripods Piers Polar Wedges
- Mount Control & Electronics
- Dovetail Clamps, Plates and Mount Adapters
- Tube Rings
- Power Supply
- Counterweights Balance Weights
- Mount Accessories - Other
- Overview:
- Telescope Accessories
- Overview:
Telescope Accessories - Eyepieces
- Barlows & Reducer Lenses
- Diagonal Mirrors and Prisms
- Binocular Viewers
- Finder Scopes
- Telescope Collimation and Test
- Cleaning Tools
- Transport and Storage
- Dust protection for Telescopes & Accessories
- Stray Light Protection
- Dewcaps and Heater
- Focusers, Adapters, Motorfocus
- Telescope DIY & Improvement
- Other telescope accessories
- Replacement Parts
- Overview:
- Filters
- Overview:
Filters - Color Filters and Color Filtersets
- Nebular Filters for Visual Observing
- Neutral-Density and Polfilter
- Photo Narrowband Nebular Filters
- Photo Broadband Filters
- Photo Planetary Filters
- Photo R-G-B and IR Cut Filters
- Photo - Filtersets
- Photometric Filters
- Clip Filter for DSLR Cameras
- Filter Wheels and Filterslider
- Solar Filters for white light
- Solarfilter for H-Alpha and Calcium
- Overview:
- Adaptors
- Overview:
Adaptors - Adapter 1,25" and 24,5mm
- Adapter 2"
- Adapter T2 - M42x0.75
- Adapter M48x0,75
- Adapter M54
- Adapter SC
- Adapter M63
- Adapter M68
- Adapter to other Threads
- Adapter Extensions
- Adapter camera bayonet
- Adapter Objective Filterthread
- Adapter Quick Changing , Rotation
- Adapter Eyepiece Projection
- Adapters Tilting
- Overview:
- Astrophotography and Photography
- Overview:
Astrophotography and Photography - Cooled Cameras
- Cameras without Cooling
- Deep-Sky Cameras uncooled
- Set-Offers Camera, Filter, Wheels
- Acessories for Cameras
- Travel mounts for astro imaging
- Imaging Correctors for Telescopes
- Autoguiding Cameras & Sets
- Everything for Guiding
- Focusing aids - Bahtinov mascs
- Flat Field foils and boxes
- Lenses for Cameras
- Piggyback Camera Holder
- Camera Bags, Photocases & more
- Digital Camera and Smartphone Adapter
- Other photo accessories
- Overview:
- Binoculars, Spotting Scopes, Microscopes, Range Finders
- Overview:
Binoculars, Spotting Scopes, Microscopes, Range Finders - Spotting Scopes and Acessories
- Roof Prism Binoculars
- Binoculars with Porro prisms
- Binoculars from 100mm Aperture
- Binoculars with 1,25 inch eyepieces
- TSMX APO Binoculars
- Binoculars for Astronomy
- Binoculars Hiking Bird watching
- Monoculars - Opera Binoculars
- Accessories for Binoculars
- Range Finders
- Microscopy
- Bags for Phototripods & Binoculars
- Overview:
- Phototripods and Binomounts
- Books, Software
- Overview:
Books, Software - Books for Astronomy Beginners
- Star Charts and Planispheres
- Books about our Solar System
- Observing Tips for Amateurs
- Popular Astronomy Literature
- Teaching material
- Astrophotography books
- Telescopes, Observatories, Construction
- Calendars Yearbooks
- Software, Star Charts
- Books for Microscopers
- Books Nature and Animals
- Nature Photography TimeLapse
- Overview:
- Night Vision, Magnifiers, Weather, Domes & more
- Beginner Astronomy and Gift Ideas
- Second Hand & Special Offers
- New products
manufacturers


Manufacturer: -TS Zubehör
Product number: TSL501
EUR94.90new
EUR 94,90RRP EUR 109,00you save 12.9% (EUR 14,10)
incl. 19 % VAT (DE)
The VAT indicated refers to that applicable in Germany. After logging in, the VAT amount is adjusted to the applicable VAT of the stored delivery country. Therefore, the final price may vary accordingly.
excl. 7.95 € shipping costs (DE)
more details to the shipping costs ...Please log in to calculate shipping costs to your country.
rating: 5.0 of 5TS-Optics 50 mm Guiding Scope and Finder Scope with 1.25" Receptacle3


- Details..
- Technical data..
- In the box..
- Manufacturer infos..
- Safety informations..
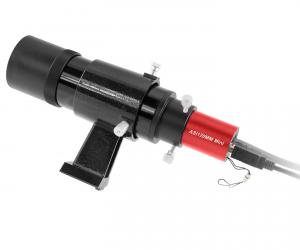
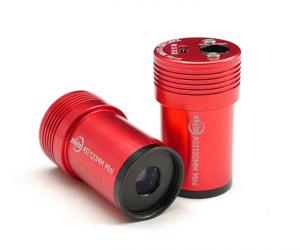
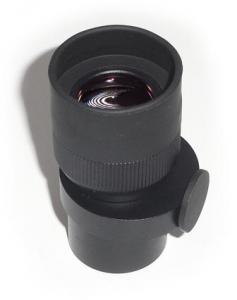
TS Mini Guide Scope for astrophotography
The guide scope is not heavier than a normal finder and fits into all standard finder shoes like they are used by Skywatcher, Vixen, GSO, TS-Optics, etc. With a suitable autoguider, you can guide telescopes up to 200 mm (8") aperture and a focal length of 1500 mm. The Guide Scope is the optimal solution for all amateuer astronomers who do not want to work with an off-axis guider or are not able to because of space issues, but their mount also have not the reserves for a large guiding scope.Even less sensitive autoguiders can be used, as you can easily adjust the TSL501. Thus can always position a sufficiently bright guide star exactly in the center. Due to the large field of view, a suitable star will always be available in the field.
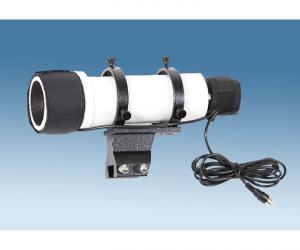
With an eyepiece, the TSL501 becomes a wide-field telescope, with a crosshair eyepiece, it becomes a finder. The former is especially convenient for owners of long focal length instruments, as they can often only now get a complete view of extended star clusters, nebulae or the Andromeda Galaxy.
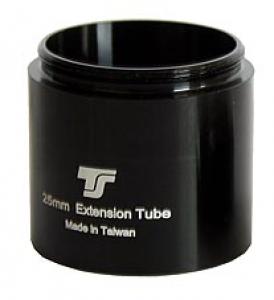
Note: The focus position of the guiding scope allows the connection of cameras with a larger flange focal distance, but this usually means that you need the TSVF1 extension tube for eyepieces in order to be able to focus.
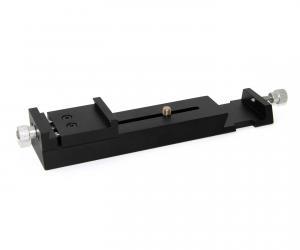
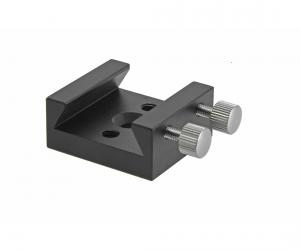
Mounting the guide scope
The guiding scope can be connected to the telescope in several ways, a basis for versatile use.The adaption of the autoguider to the 1.25" receptacle
The TSL501 offers a generously placed focus position behind the 1.25" receptacle, so you can focus all popular autoguiders, like M-Gen or the autoguiders from ZWO, like the ASI120 Mini, without problems.Focusing the autoguider:
You need to focus only once, afterwards it is sufficient to put the autoguider into the guide scope and start. For calibrating autoguider and guide scope to each other, proceed as follows:Ready - now you have calibrated your autoguider to the guide scope. In future you only have to put the guider into the guide scope and then you can start right away.
| Objective: | 2-element, achromatic objective, airspaced |
| Aperture: | 50 mm |
| Focal length: | 180 mm |
| Coating: | Fully coated |
| Focal point: | 20 mm behind the 1.25" receptacle |
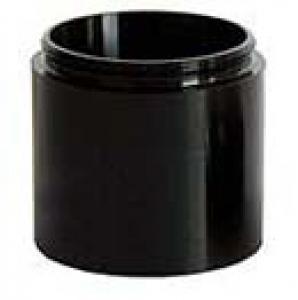
| Diameter on the front: | 56.5 mm |
| Weight: | 450 grams |
| Manufacturer / Importeur: | Teleskop-Service Ransburg GmbH |
| Street: | Von-Myra-Str. 8 |
| ZIP / City: | 85599 Parsdorf |
| Country: | Germany |
| Telefon number: | +49 89 99228750 |
| Email: | info@teleskop-service.de |
| Website: | www.teleskop-express.de |
Safety informations: PDF Download
Recommended accessories
Adaptors


Alternatives to this product - Suggestions from TS
TS-Optics Guiding Set 50 mm Mini Guide Scope and ASI120MM Mini guiding camera
EUR 299,00RRP EUR 339,00you save 11.8% (EUR 40,00)
Cleaning & Collimating
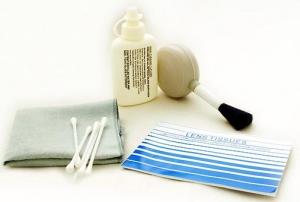
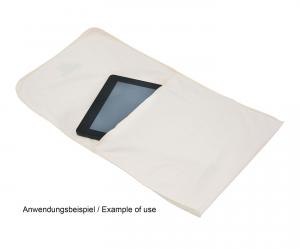
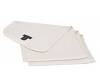
TS-Optics Optical Soft Microfibre Cleaning Cloth and Bag, 26x24 cm
EUR 7,50RRP EUR 11,95you save 37.2% (EUR 4,45)
Customers who bought this product also bought...
ZWO Mono Astro Camera ASI120MM Mini, Sensor D=6.1 mm - also compact Autoguider
EUR 161,00RRP EUR 229,00you save 29.7% (EUR 68,00)
Diagonal Mirrors & Prisms
Eyepieces
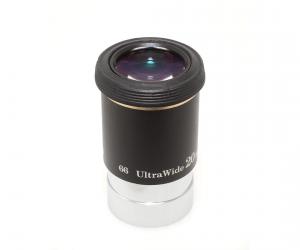
TS-Optics Ultra Wide Angle Eyepiece 20 mm 1,25" - 66° field of view
EUR 39,90RRP EUR 59,00you save 32.4% (EUR 19,10)
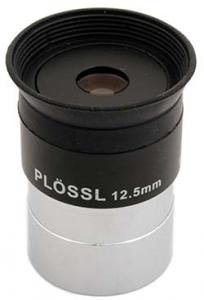
TS-Optics 1.25" Plössl Eyepiece - 12.5 mm focal length
EUR 16,90RRP EUR 26,90you save 37.2% (EUR 10,00)
General Accessories
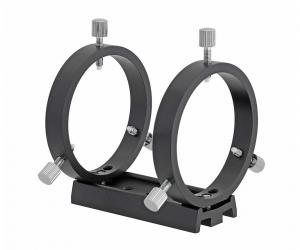
TS-Optics Adjustable Guide Scope Rings for 50 mm and 60 mm finder scopes and guiding...
EUR 34,90RRP EUR 55,90you save 37.6% (EUR 21,00)
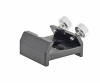
TS-Optics finder shoe - flexible base for standard finder holders - extra stable
EUR 16,90RRP EUR 28,00you save 39.6% (EUR 11,10)
Reviews
Written by Marco Iozzi
on 2025-04-02
"Very good product, no issues found"
Written by Hartmut Scholz
on 2023-07-05
"Umständliche focusierung"
Written by Thomas Ebel
on 2022-05-17
"Gutes kl Guiding Leitrohr. Den Fokus zu finden ist ein bisschen zeitraubend"
Written by David Betzel
on 2022-01-30
"Günstiges Gesamtpaket und stabil ausgeführt. Die Optik ist gut und mit 50mm Öffnung und der sehr kurzen Brennweite genau ausreichende für meinen 72er APO. Für ***EUR ist wirklich alles dabei, auch ein Adapter zur Befestigung an Fotostativen statt im Sucherschuh. Leider hat bei meinem verwendeten Fadenkreuzokular von APM (24mm) keine Scharfstellung geklappt, ich habe mir dafür eine Verlängerung am 1,25-Zoll-Gewinde gekauft. Durch die weiteren 25mm an Länge kann ich jetzt perfekt fokussieren, denn das Fadenkreuzokular hat selbst noch eine eigene kleine Fokussierung. Alles in allem eine super Alternative zu den größeren Komplettpaketen mit teilweise fest integrierten Okulare... Ich wollte da flexibler sein und habe nur genau das richtige Sucherfernrohr mit späterer Option zum Guiding."
Written by Seraphin Feller
on 2021-11-17
"Der Federdruck in der Justage ist relativ klein, so dass sich die Justage leicht verschieben kann, was in der Nachführung zu fehlern führen kann. Es wäre gut den Federdruck zu erhöhen und einen besser passenden ORing einzusetzen. Der verwendete Oring ist zu klein."
Written by Timo Prenzler
on 2021-09-10
"Artikel schnell geliefert und entspricht den Erwartungen"
Written by Harald Michaelis
on 2020-09-28
"Ist sehr gut als Guider geeignet. Lässt sich gut schafstellen."
Written by Björn Voss
on 2020-07-24
"Super, alles ok, passt "
Written by Helmut Bergler
on 2020-07-07
"Wirkt hochwertig und stabil gefertigt. "
Written by Björn Voss
on 2020-07-07
Super und gute Qualität
Written by Peter Wacker
on 2020-05-28
"Geliefert wie beschrieben"
Written by Claudio Solis
on 2018-07-06
*****
Written by Milen Gogov
on 2017-08-25
Excellent
Written by Klaus Kamm
on 2016-09-27
"Passt gut auf Halterungen. Leichtgängige Fokussierung mit Konterring. "
